一、概念
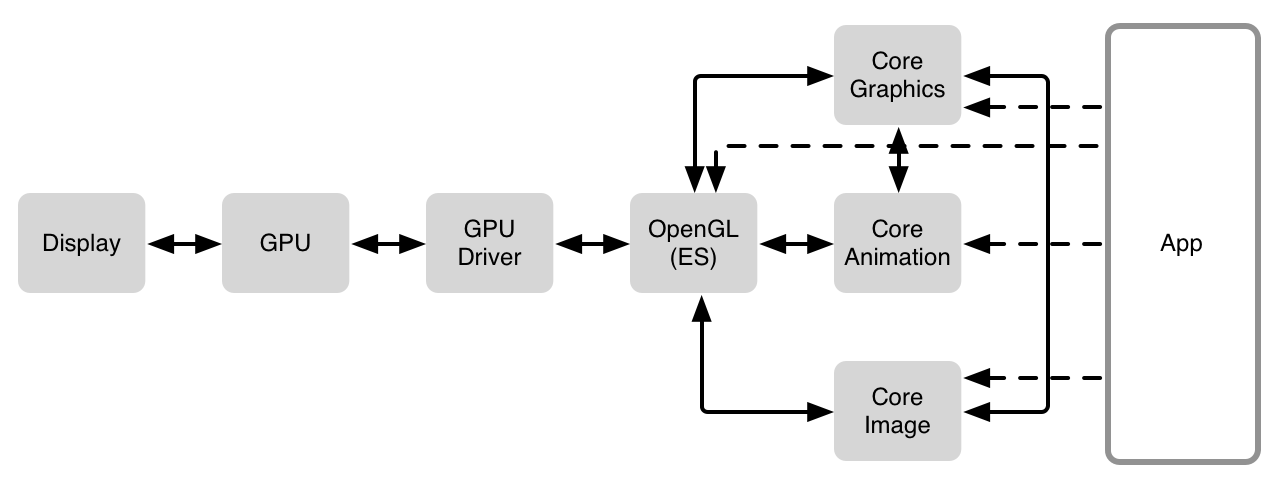
Core Graphics Framework
Core Graphics Framework 是一套基于C的API框架,使用了Quartz作为绘图引擎。它提供了低级别、轻量级、高保真度的2D渲染。该框架可以用于基于路径的绘图、变换、颜色管理、脱屏渲染,模板、渐变、遮蔽、图像数据管理、图像的创建、遮罩以及PDF文档的创建、显示和分析
Graphics Context
Graphics Context是一个数据类型(CGContextRef)、Quartz绘制图像到输出设备的信息都保存在其中,Graphics Context定义了基本的绘制属性,如颜色、裁减区域、线条宽度和样式信息、字体信息、混合模式等
使用UiKit,你只能在当前上下文中绘图,所以如果你当前处于UIGraphicsBeginImageContextWithOptions函数或drawRect:方法中,你就可以直接使用UIKit提供的方法进行绘图。如果你持有一个context:参数,那么使用UIKit提供的方法之前,必须将该上下文参数转化为当前上下文。幸运的是,调用UIGraphicsPushContext 函数可以方便的将context:参数转化为当前上下文,记住最后别忘了调用UIGraphicsPopContext函数恢复上下文环境。
通过调用UIGraphicsGetCurrentContext()方法可以获取当前的Graphics Context
二、五种绘图方式
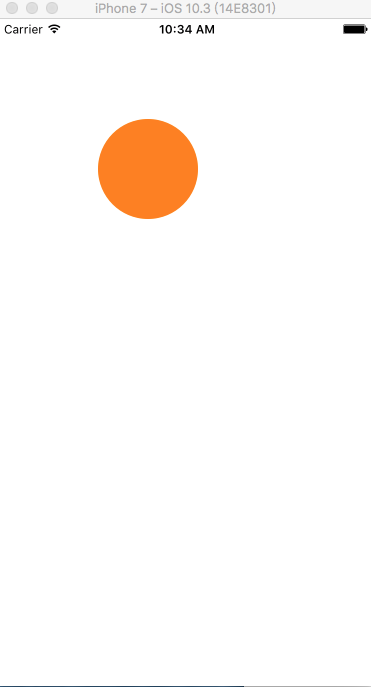
用六种方式来画下面这个圆
所有的代码可以Github-五种绘图方式
1、UIView+drawRect+UIBezierPath
重写drawRect能够自动生成Context,所以可以在drawRect方法里面画图形
- (void)drawRect:(CGRect)rect{
    UIBezierPath *p = [UIBezierPath bezierPathWithOvalInRect:CGRectMake(100,100,100,100)];
    [[UIColor orangeColor] setFill];
    [p fill];
}
2、UIView+drawRect+context
获取到drawRect自动生成的context,在context里画图形
- (void)drawRect:(CGRect)rect{
    CGContextRef context = UIGraphicsGetCurrentContext();
    CGContextAddEllipseInRect(context, CGRectMake(100,100,100,100));
    CGContextSetFillColorWithColor(context, [UIColor orangeColor].CGColor);
    CGContextFillPath(context);
}
3、UIView+drawLayer: inContext:
注意要显式调用[view.layer setNeedsDisplay]这个方法才起作用
- (void)drawLayer:(CALayer *)layer inContext:(CGContextRef)ctx{
    CGContextAddEllipseInRect(ctx, CGRectMake(100,100,100,100));
    CGContextSetFillColorWithColor(ctx, [UIColor orangeColor].CGColor);
    CGContextFillPath(ctx);
}
或者
- (void)drawLayer:(CALayer *)layer inContext:(CGContextRef)ctx{
    UIGraphicsPushContext(ctx);
    UIBezierPath* p = [UIBezierPath bezierPathWithOvalInRect:CGRectMake(100,100,100,100)];
    [[UIColor orangeColor] setFill];
    [p fill];
    UIGraphicsPopContext();
}
4、CALayer+drawInContext
插入Layer层,注意插入Layer层时,要显式调用setNeedsDisplay,这样就会调用drawInContext
    DrawLayer *layer = [[DrawLayer alloc]init];
    layer.frame = self.view.bounds;
    [layer setNeedsDisplay];
    [self.view.layer addSublayer:layer];
@implementation DrawLayer

- (void)drawInContext:(CGContextRef)ctx{
    CGContextAddEllipseInRect(ctx, CGRectMake(100,100,100,100));
    CGContextSetFillColorWithColor(ctx, [UIColor orangeColor].CGColor);
    CGContextFillPath(ctx);
}
@end
5、UIGraphicsBeginImageContextWithOptions
- (void)drawImage{
    UIGraphicsBeginImageContextWithOptions(CGSizeMake(100,100), NO, 0);
    CGContextRef con = UIGraphicsGetCurrentContext();
    CGContextAddEllipseInRect(con, CGRectMake(0,0,100,100));
    CGContextSetFillColorWithColor(con, [UIColor orangeColor].CGColor);
    CGContextFillPath(con);
    UIImage* image = UIGraphicsGetImageFromCurrentImageContext();
    UIGraphicsEndImageContext();
    UIImageView  *imageView = [[UIImageView alloc] initWithFrame:CGRectMake(100, 100, 100, 100)];
    [imageView setImage:image];
    [self.view addSubview:imageView];
}
或者
    UIGraphicsBeginImageContextWithOptions(CGSizeMake(100,100), NO, 0);
    UIBezierPath* p = [UIBezierPath bezierPathWithOvalInRect:CGRectMake(0,0,100,100)];
    [[UIColor blueColor] setFill];
    [p fill];
    UIImage* image = UIGraphicsGetImageFromCurrentImageContext();
    UIGraphicsEndImageContext();
    UIImageView  *imageView = [[UIImageView alloc] initWithFrame:CGRectMake(100, 100, 100, 100)];
    [imageView setImage:image];
    [self.view addSubview:imageView];
三、上下文切换
1、CGContextSaveGState/CGContextRestoreGState
[[UIColor redColor] setStroke]; //画笔红色
CGContextSaveGState(UIGraphicsGetCurrentContext()); //记录上下文的当前状态
[[UIColor blackColor] setStroke]; //画笔黑色
CGContextRestoreGState(UIGraphicsGetCurrentContext()); //恢复之前记录的上下文状态
UIRectFill(CGRectMake(10, 10, 100, 100)); //绘制红色矩形
2、UIGraphicsPushContext/UIGraphicsPopContext
- 当前正在使用CoreGraphics绘制图形A,想要使用UIKit绘制完全不同的图形B,此时就希望保存当前绘图context及已绘制内容。
- 使用UIGraphicsPushContext切换到一个全新的绘图context。
- 使用UIKit绘制图形B。
- 使用UIGraphicsPopContext恢复之前的绘图context,继续使用CoreGraphics绘制图形A。
- (void)drawLayer:(CALayer *)layer inContext:(CGContextRef)ctx{
    UIGraphicsPushContext(ctx);
    UIBezierPath* p = [UIBezierPath bezierPathWithOvalInRect:CGRectMake(100,100,100,100)];
    [[UIColor orangeColor] setFill];
    [p fill];
    UIGraphicsPopContext();
}
3、UIGraphicsBeginImageContext/UIGraphicsEndImageContext
如果想在切换绘图context后,继续使用CoreGraphics绘图(而非UIKit),则不需要使用UIGraphicsPushContext/UIGraphicsPopContext。因为CoreGraphics已将绘图context视为参数。使用场景是:
- 当前正在绘制图形A。
- 使用UIGraphicsBeginImageContext将旧的绘图context入栈,创建新的绘图context并使用。
- 绘制图形B。
- 结束绘制图形B之后,使用UIGraphicsEndImageContext恢复到之前的绘图context,继续绘制图形A。
// 绘图中
UIGraphicsBeginImageContext(CGSizeMake(200, 200));
[self.view drawViewHierarchyInRect:self.view.bounds afterScreenUpdates:YES];
UIImage *snapshot = UIGraphicsGetImageFromCurrentImageContext();
UIGraphicsEndImageContext();
imageView.image = snapshot;
// 继续绘图
四、CALayer与UIView
视图即UIView,并不是直接显示在屏幕上,而是在创建视图对象的时候视图对象会自动创建一个层,而视图对象把要显示的东西绘制在层上,待到需要显示时硬件将所有的层拷贝,然后按Z轴的高低合成最终的显示结果
view的完整显示过程
- view.layer会准备一个Layer Graphics Contex(图层类型的上下文)
- 调用view.layer.delegate(view)的drawLayer:inContext:,并传入刚才准备好的上下文
- view的drawLayer:inContext:方法内部又会调用view的drawRect:方法
- view就可以在drawRect:方法中实现绘图代码, 所有东西最终都绘制到view.layer上面
- 系统再将view.layer的内容拷贝到屏幕, 于是完成了view的显示